
Little Boo Rice Krispies
The following content may contain affiliate links. When you click and shop the links, A. Taylor Studio receives a commission.

Do you remember your childhood Halloween parties at school? I do! I remember heading out to recess, and then when we got back in to the classroom, there would be a magical spread of cookies, desserts, candy, doughnuts, and chips. It appeared as if from nowhere! I never thought about how it got there, and I doubt any of my classmates did either. Those homeroom moms and teachers were saints…can you imagine the sugar rush they dealt with after the first wave of hungry elementary school kids!?
It was at one of these parties that I remember tasting my first NON-Kellogg rice krispies treat. I guess I had only been used to the ones pre-wrapped, you know, in the blue box. When I saw the platter of rice krispies treats, I was a little skeptical of the shape. Why wasn’t it shaped like all of the rice krispies treats I had from the box? Well, turns out…these were home made. And I can remember it with such nostaglia…a love affair began.
Every single homeroom party from then on, I would look for the rice krispies treats and sure enough, they were there. It was truly a special ocassion to have one. I must have made a comment to my mom about how good they were, and she was like, “really!? I didn’t know you liked them. They are so easy to make.” And so, from then on, we made them at home! I’ll never forget when we made green Rice Krispies when the Eagles went to the Superbowl XXXIX. Or the time in 10th grade biology class where we had to make an edible plant cell. Guess what was my chosen medium? Of course, the rice krispies treat!
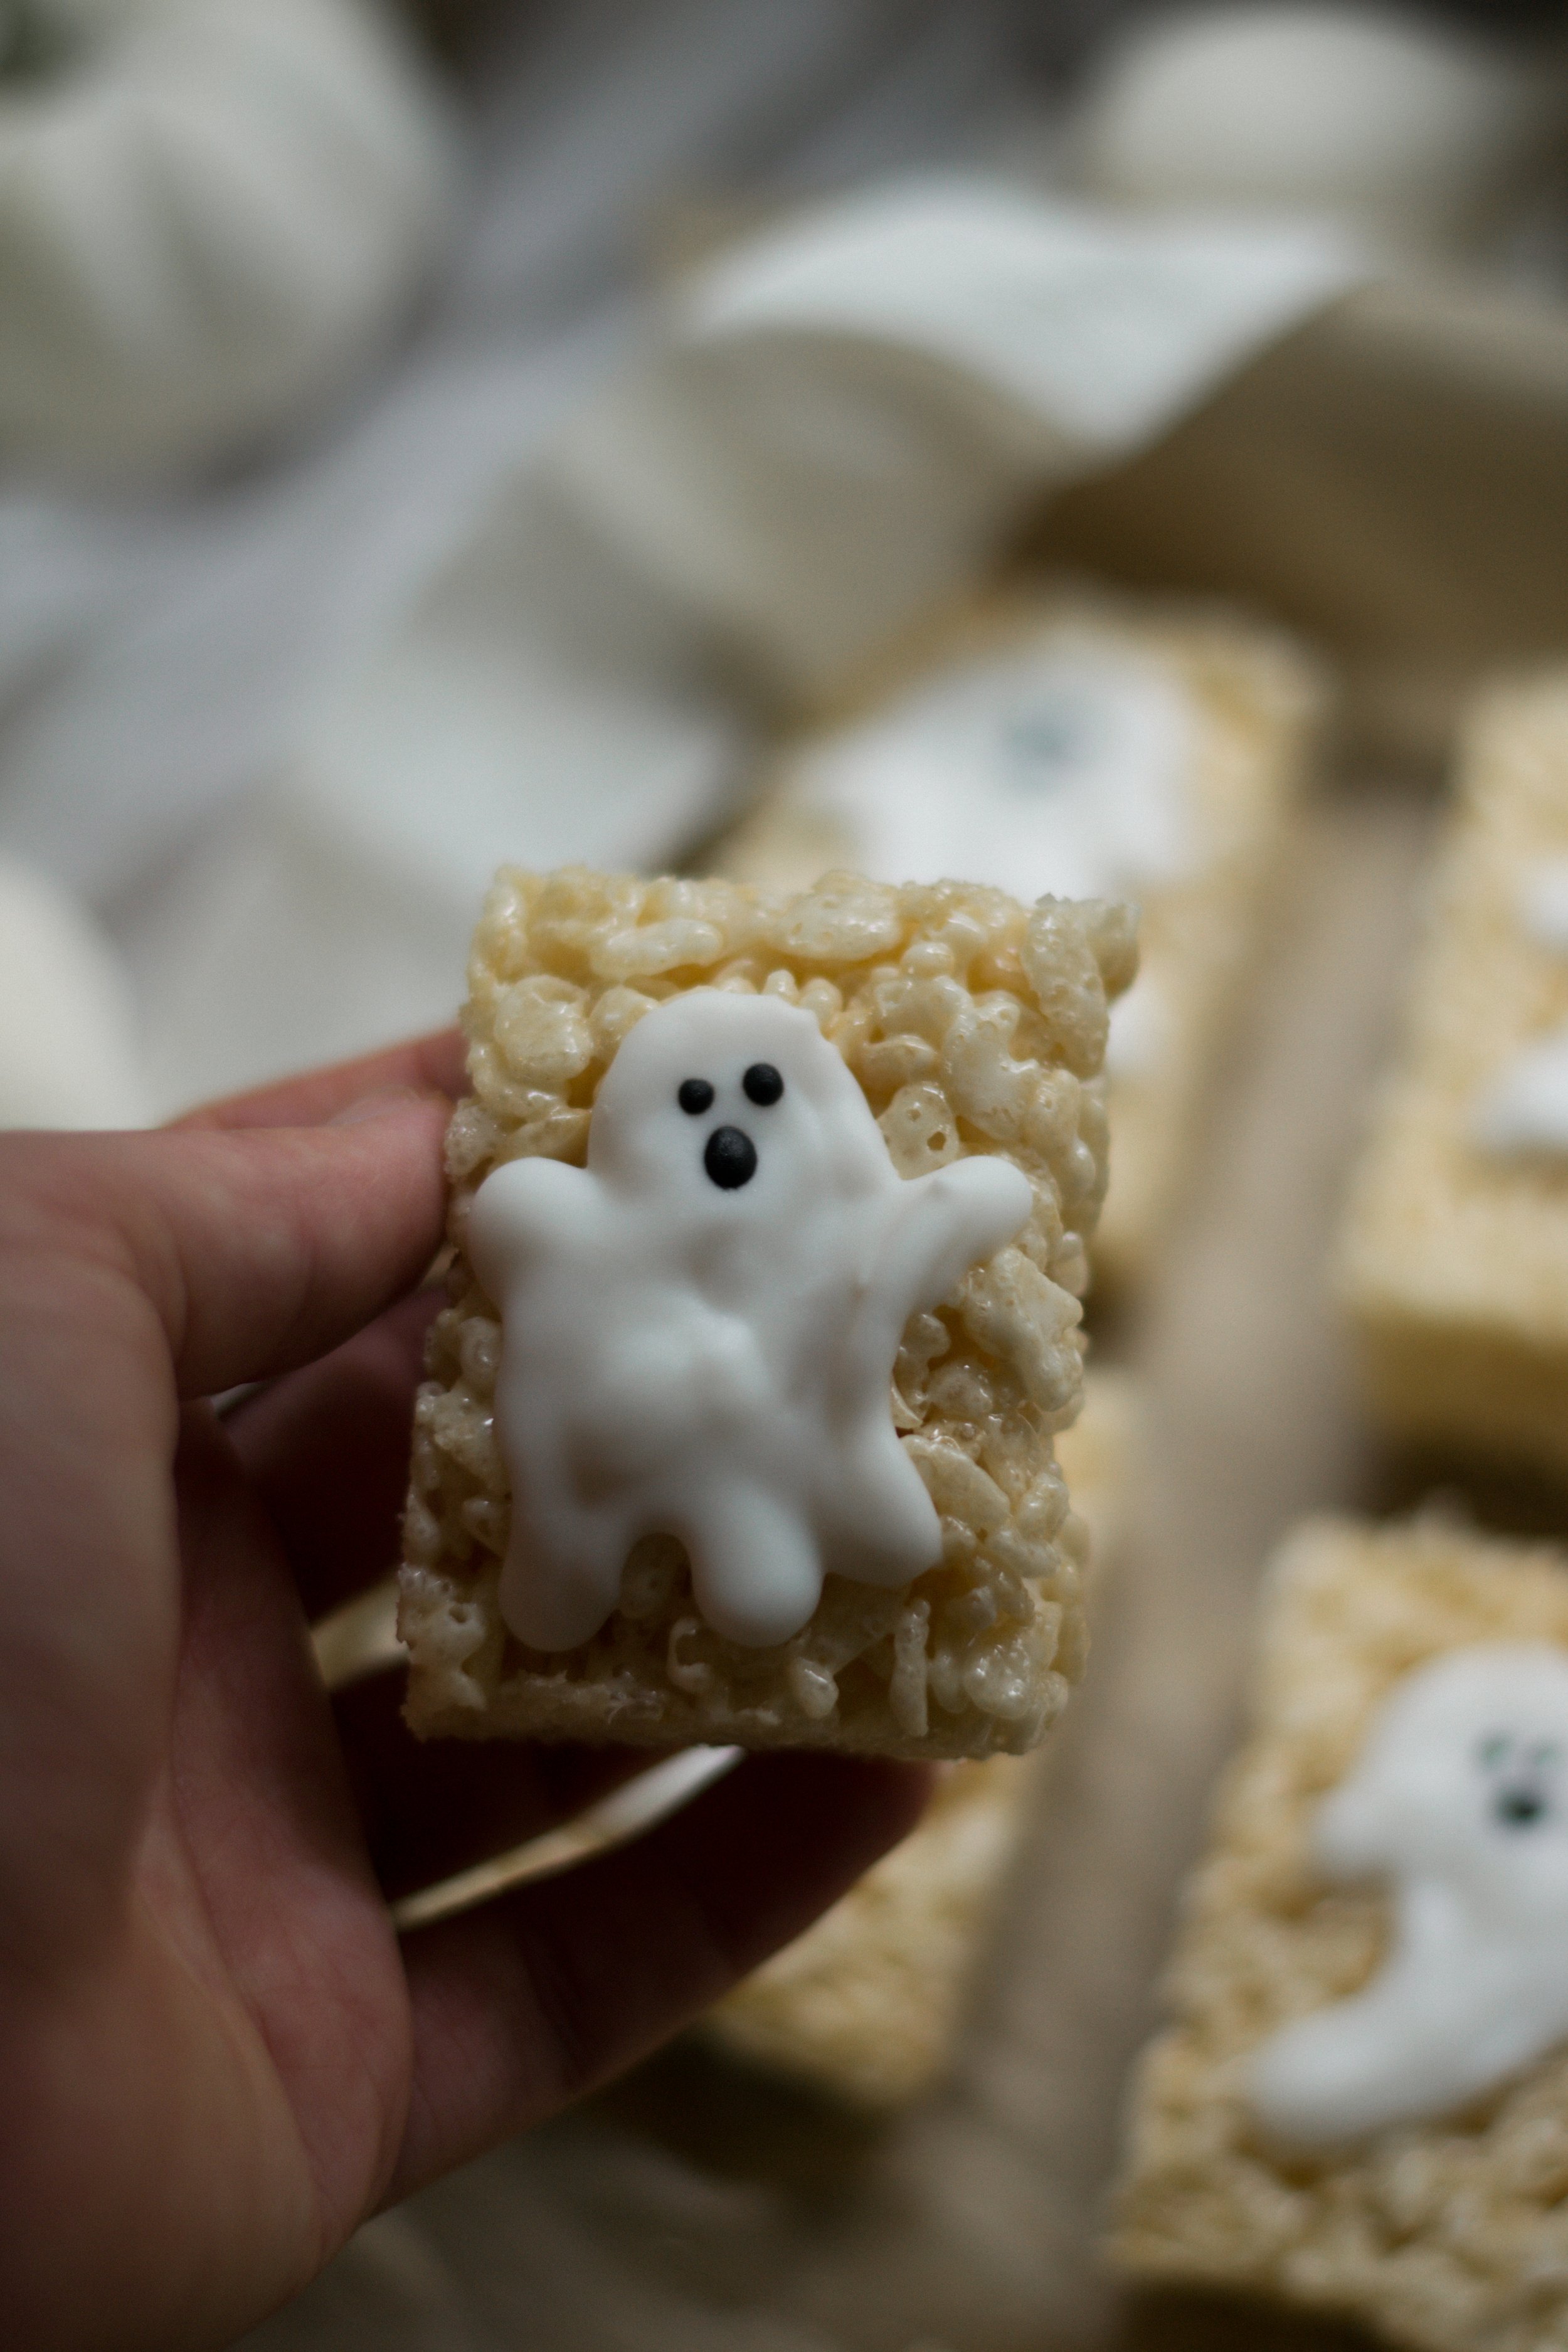
Now that I am a mom, I know why they are so popular for classroom parties. They are so easy to make… score! So, for my daughter’s Halloween party at school, I decided to try the Rice Krispies with a pinterest-inspired artistic flair. Little ghosts!
Let me tell you, I totally understand why pastry chefs and bakers charge top dollar for their sweets. Especially the decorated ones…this looks SO simple, but it was hard!
Little Boo Rice Krispies
Yields about 15-18 individual Rice Krispies Treats
6 cups Rice Krispies cereal
40 Jet-Puff Marshmallows (I got the Jumbo/Large size)
3 tbs butter
Cookie Icing (I used white and black)
In a large saucepan, heat butter on low and add marshmallows. Stir until melted. Then, add rice krispies in small amounts until all of it is stirred into the butter/marshmallow mixture. This can get sticky, so definitely use a spatula! The gooier you want your rice krispies treats, the less cereal you’ll want to add. I found 6 cups: 40 marshmallows to be an ideal ratio.
On a 9x13” pan, line parchment paper and gently spoon the rice krispies onto the parchment paper. Allow to cool. I molded mine to the shape of the pan by simply using another sheet of parchment paper on top. Highly recommend this, it didn’t stick and made clean up easy.
Once cooled, it is time to add your icing! I purchased simple black and white cookie icing from Michael’s. The brand I used was Satin Ice.

Helpful decorating hint —
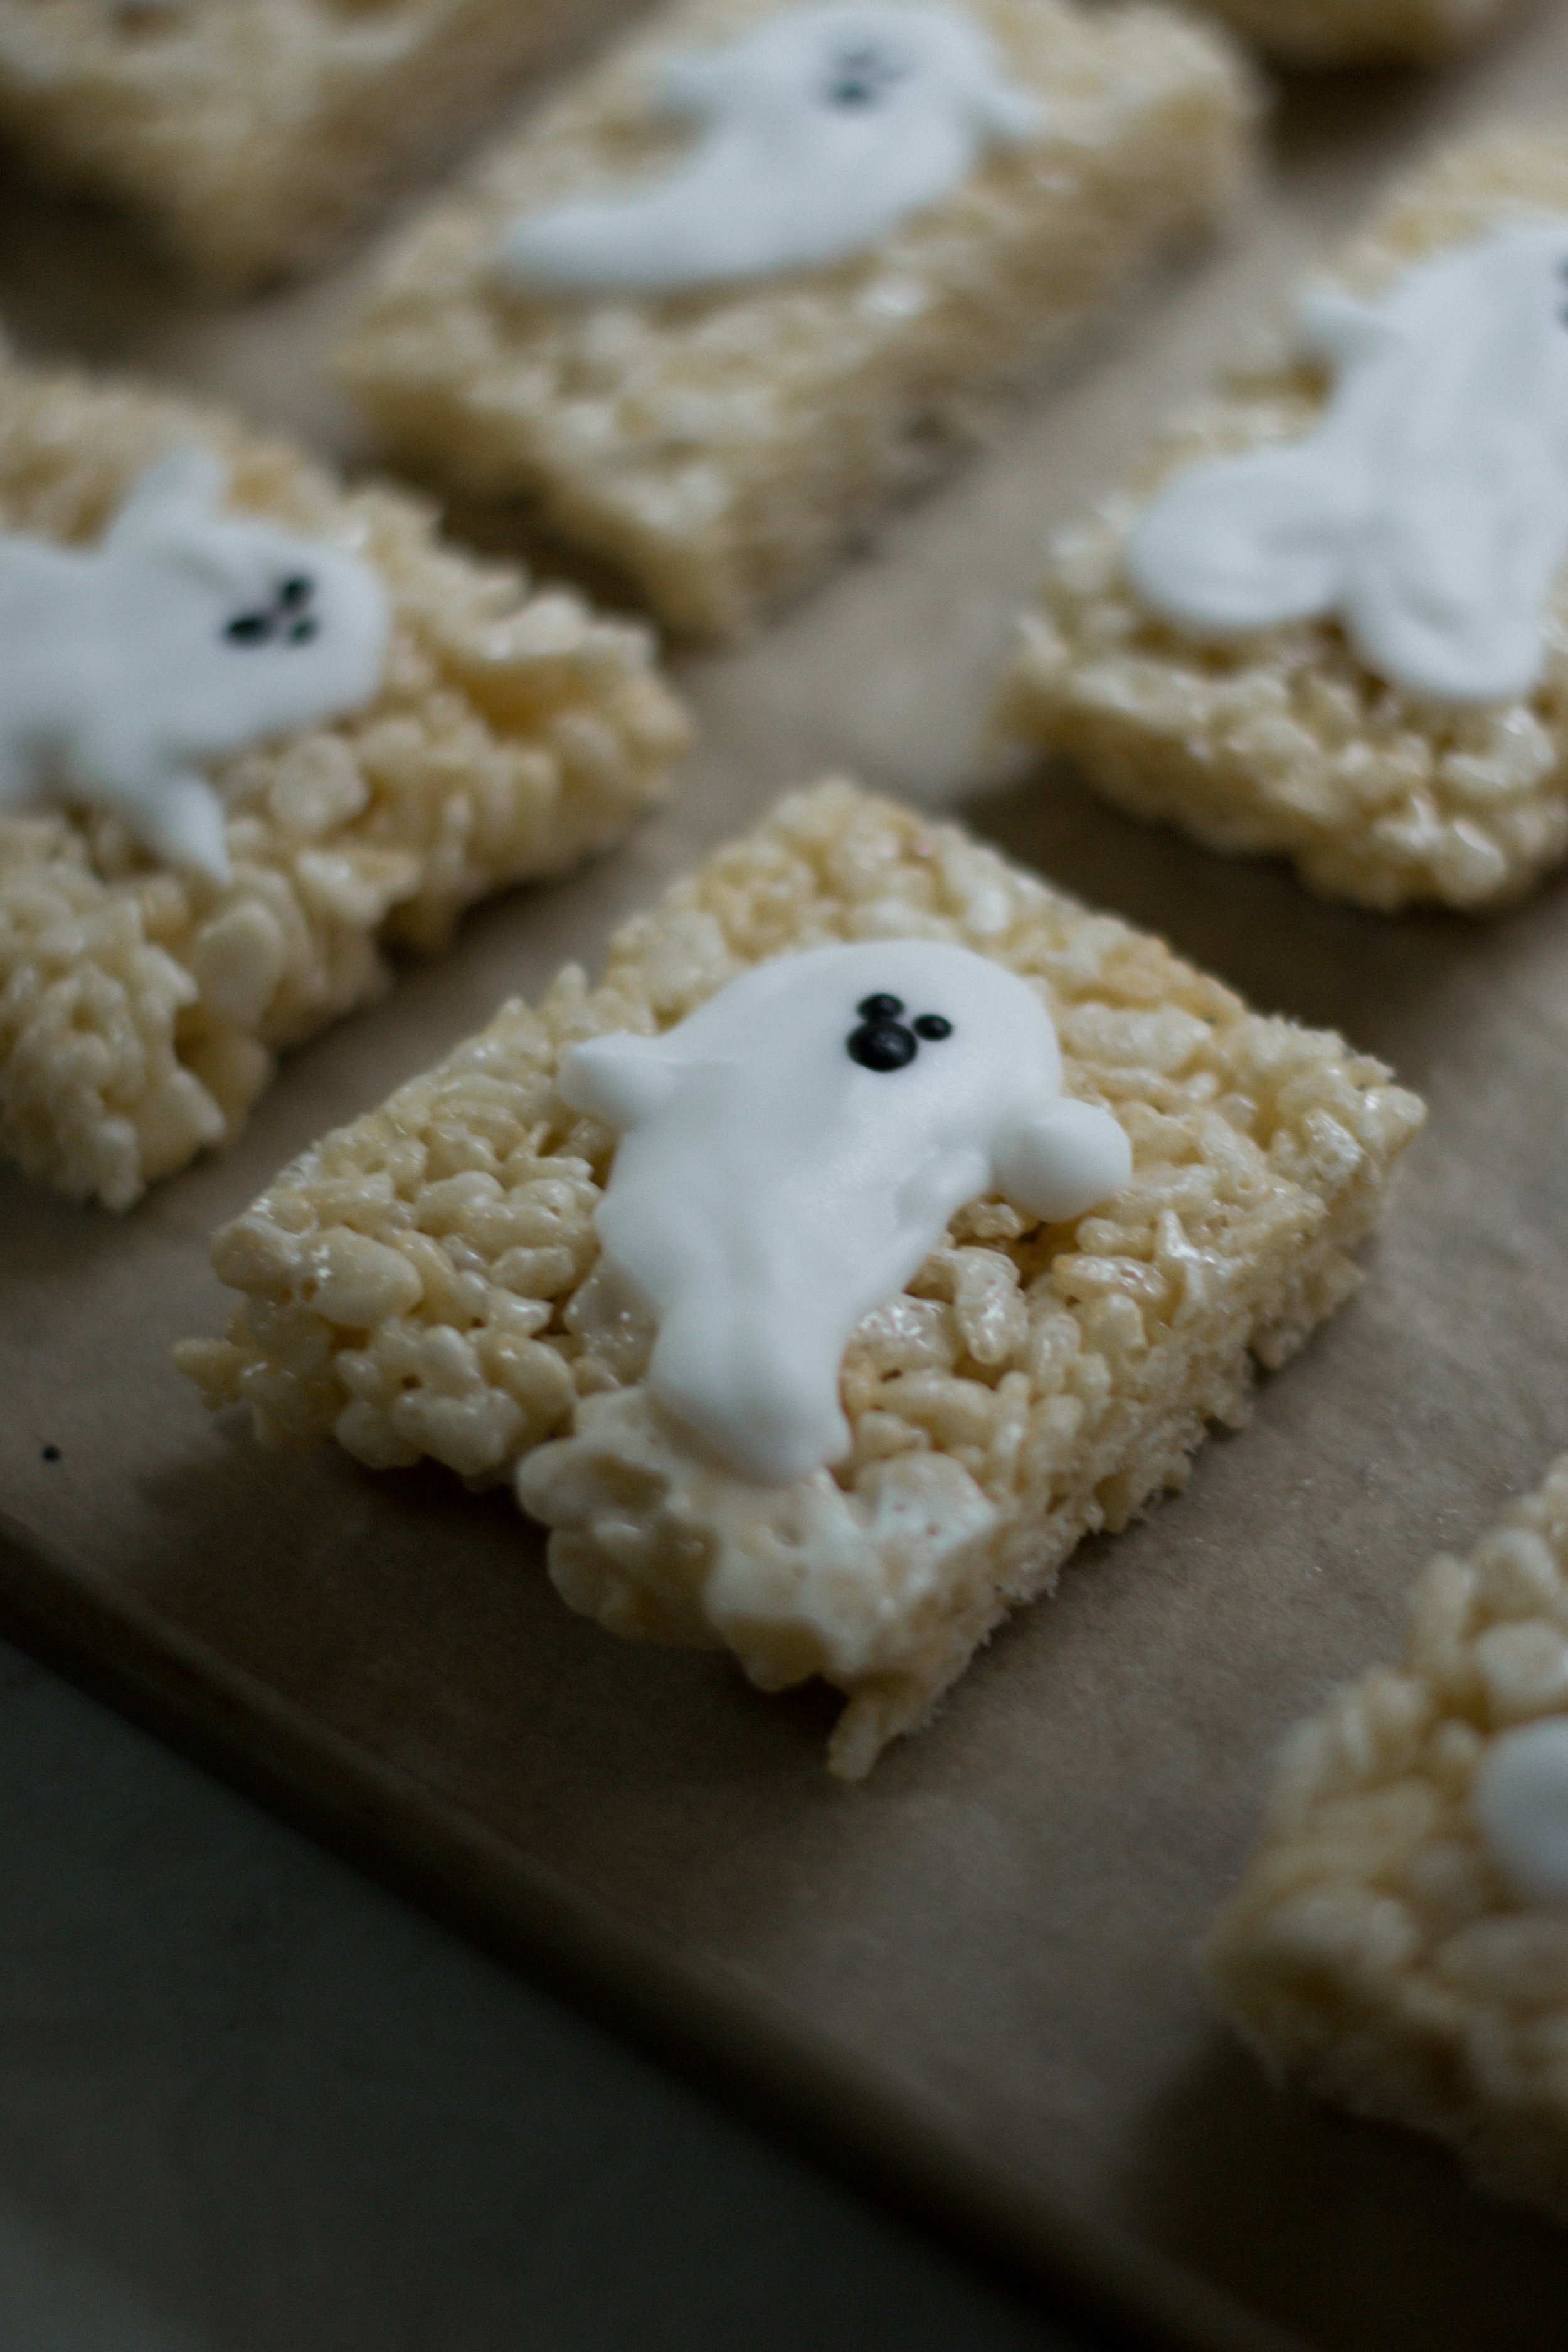
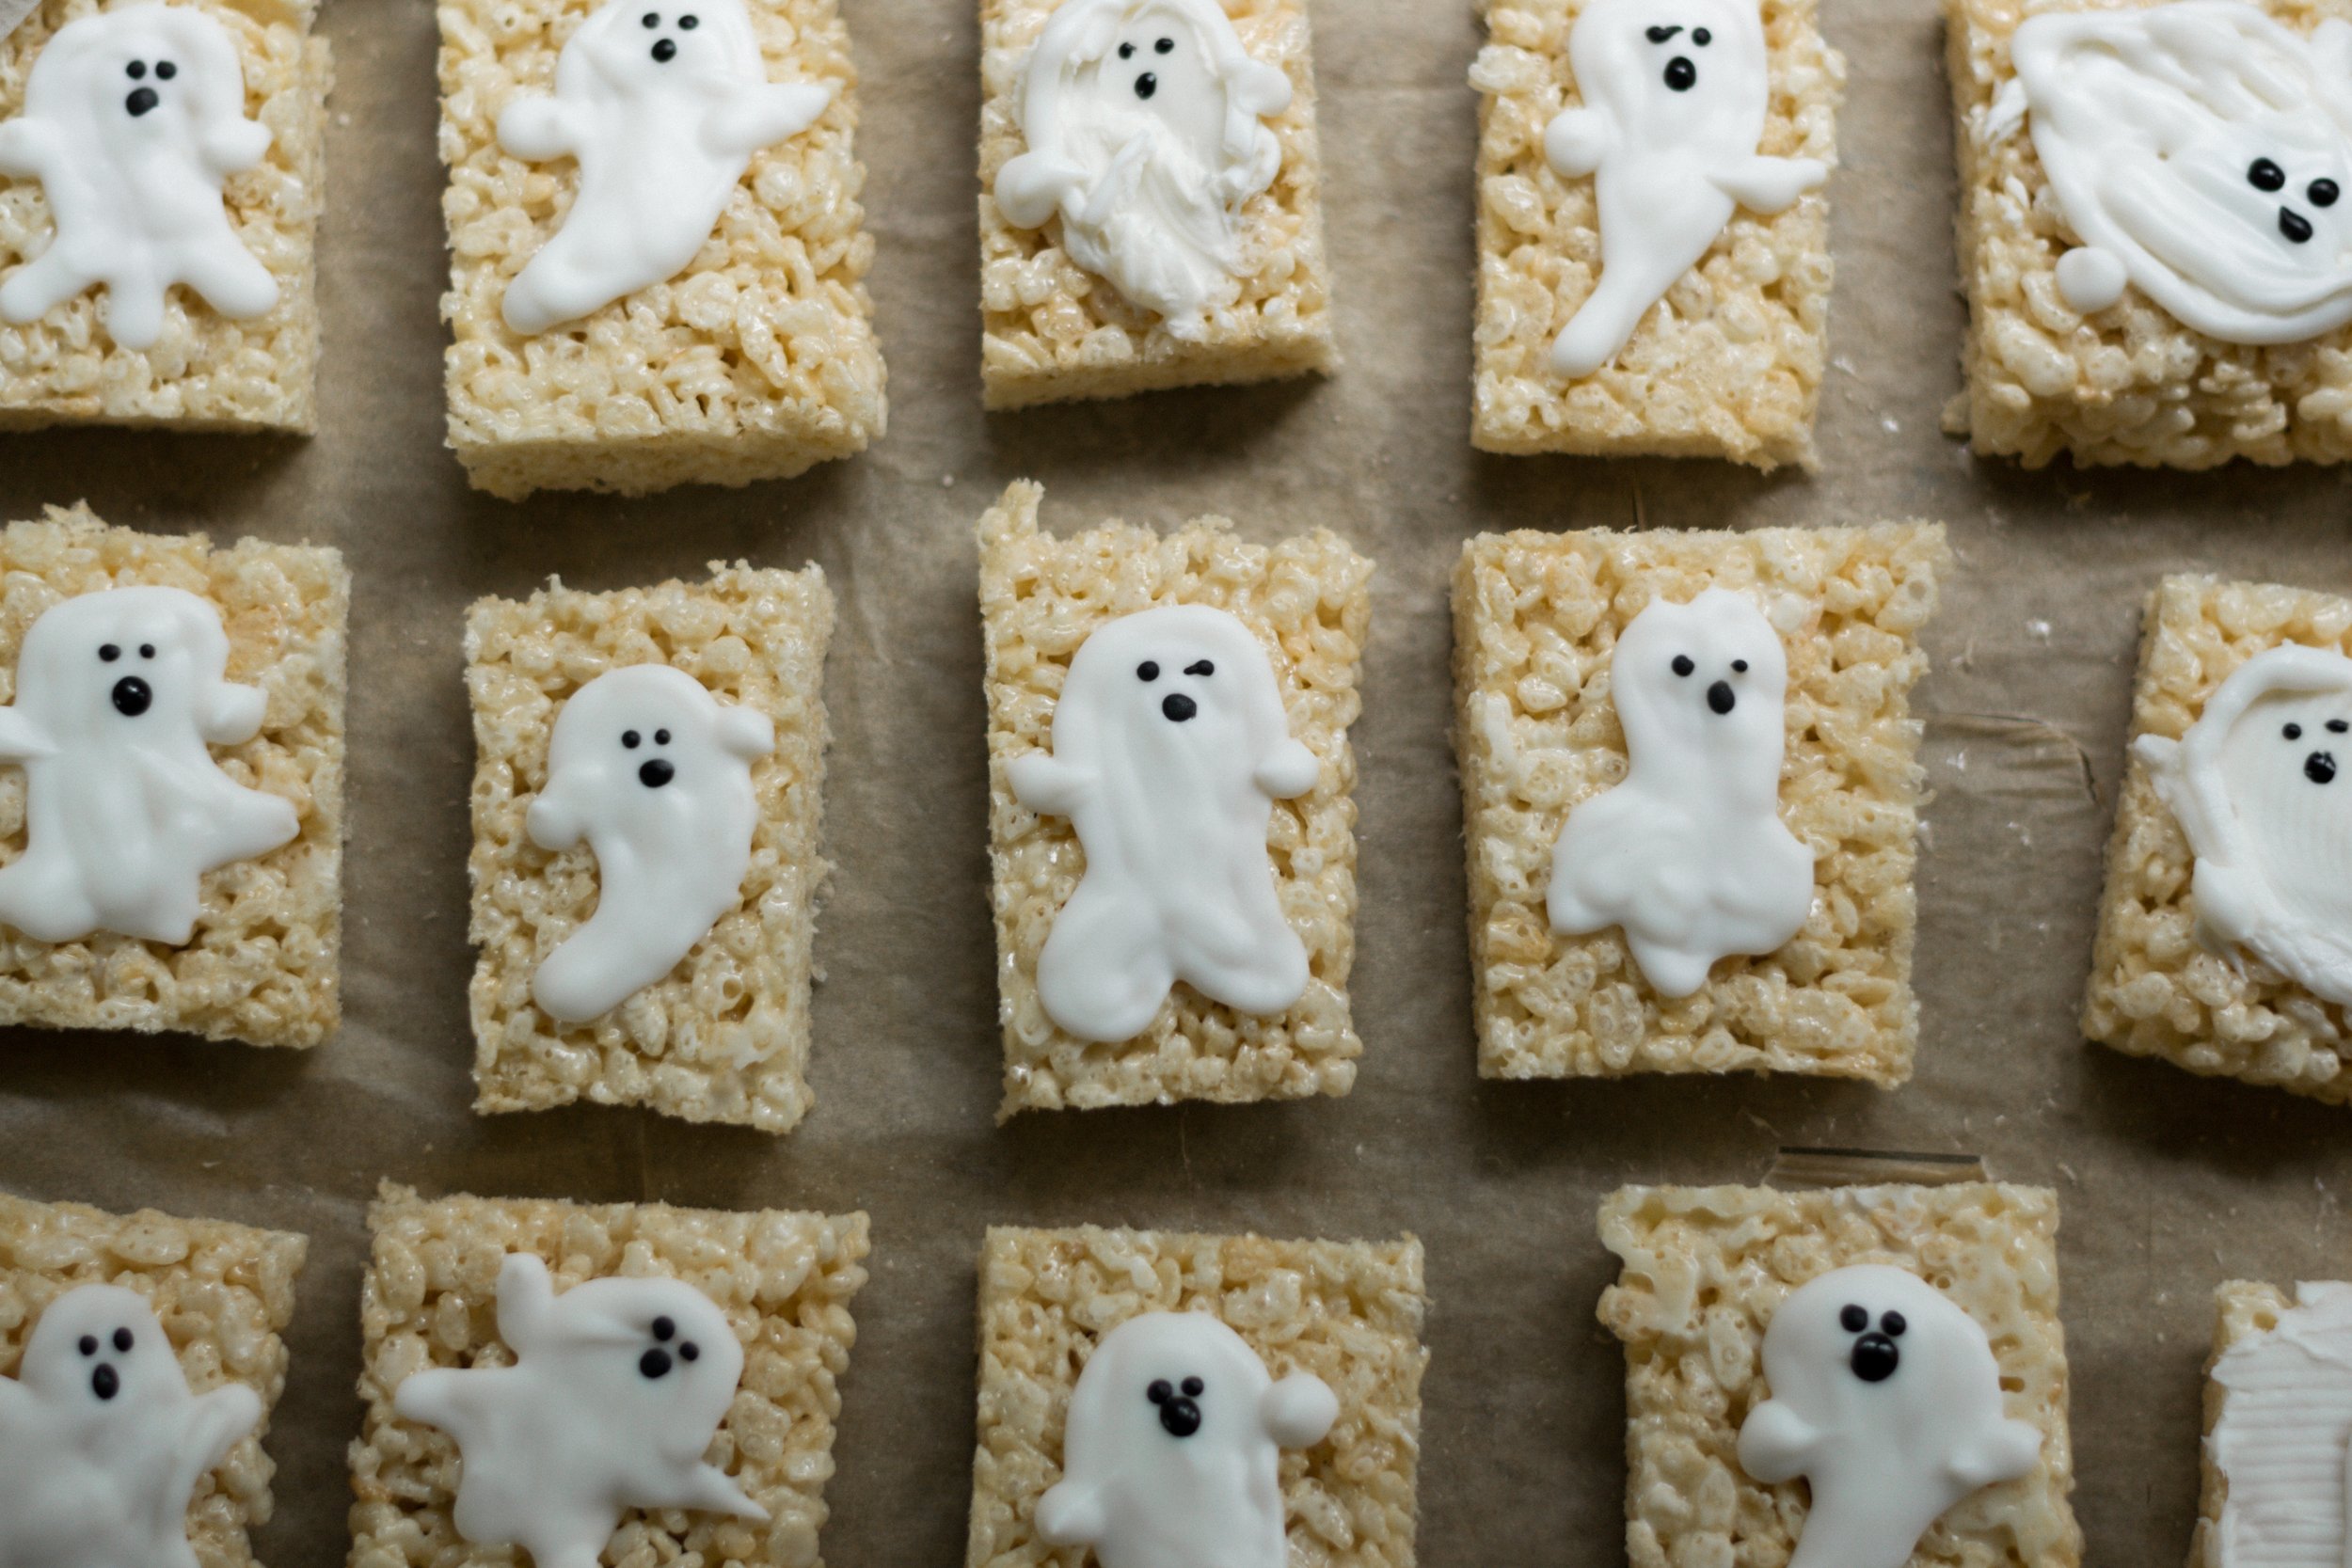
Give yourself a tester Rice Krispie to experiment with the right icing consistency! This is an example of a “mistake” one — the icing came out far too quickly!
This is the tricky part. I made sure to cut my Rice Krispies with a sharp knife to the size I wanted. Then, I prepped my cookie icing by warming it up in the microwave. I am known to be impatient with decorating baked goods, and then messing it up in the process…trust me when I say the consistency matters! You want to get this warmed up just a little bit before you squeeze it out. I would suggest testing out your consistency on a test piece or some of the parchment paper.
Once you reach the desired consistency, squeeze your white icing into a teardrop shape (or whatever ghostly shape you want). Outline it first, then flood the teardrop, and then allow it to cool. Once I did all of my Rice Krispies, I refridgerated it exactly 8 minutes before adding the black dots.
Beware of the black icing…it came out SO ferociously and rapidly, compared to the white icing! I truly recommend the SMALLEST DOT possible because it will bleed into a bigger shape if you’re too liberal with it. You can see below what happened to the black ink when I got carried away. If you’re a novice baker, like me, I recommend using piping bags to get even more control of the amount you can squeeze out. For the dots (eyes and mouth), all you want is a simple glob right onto the white icing.
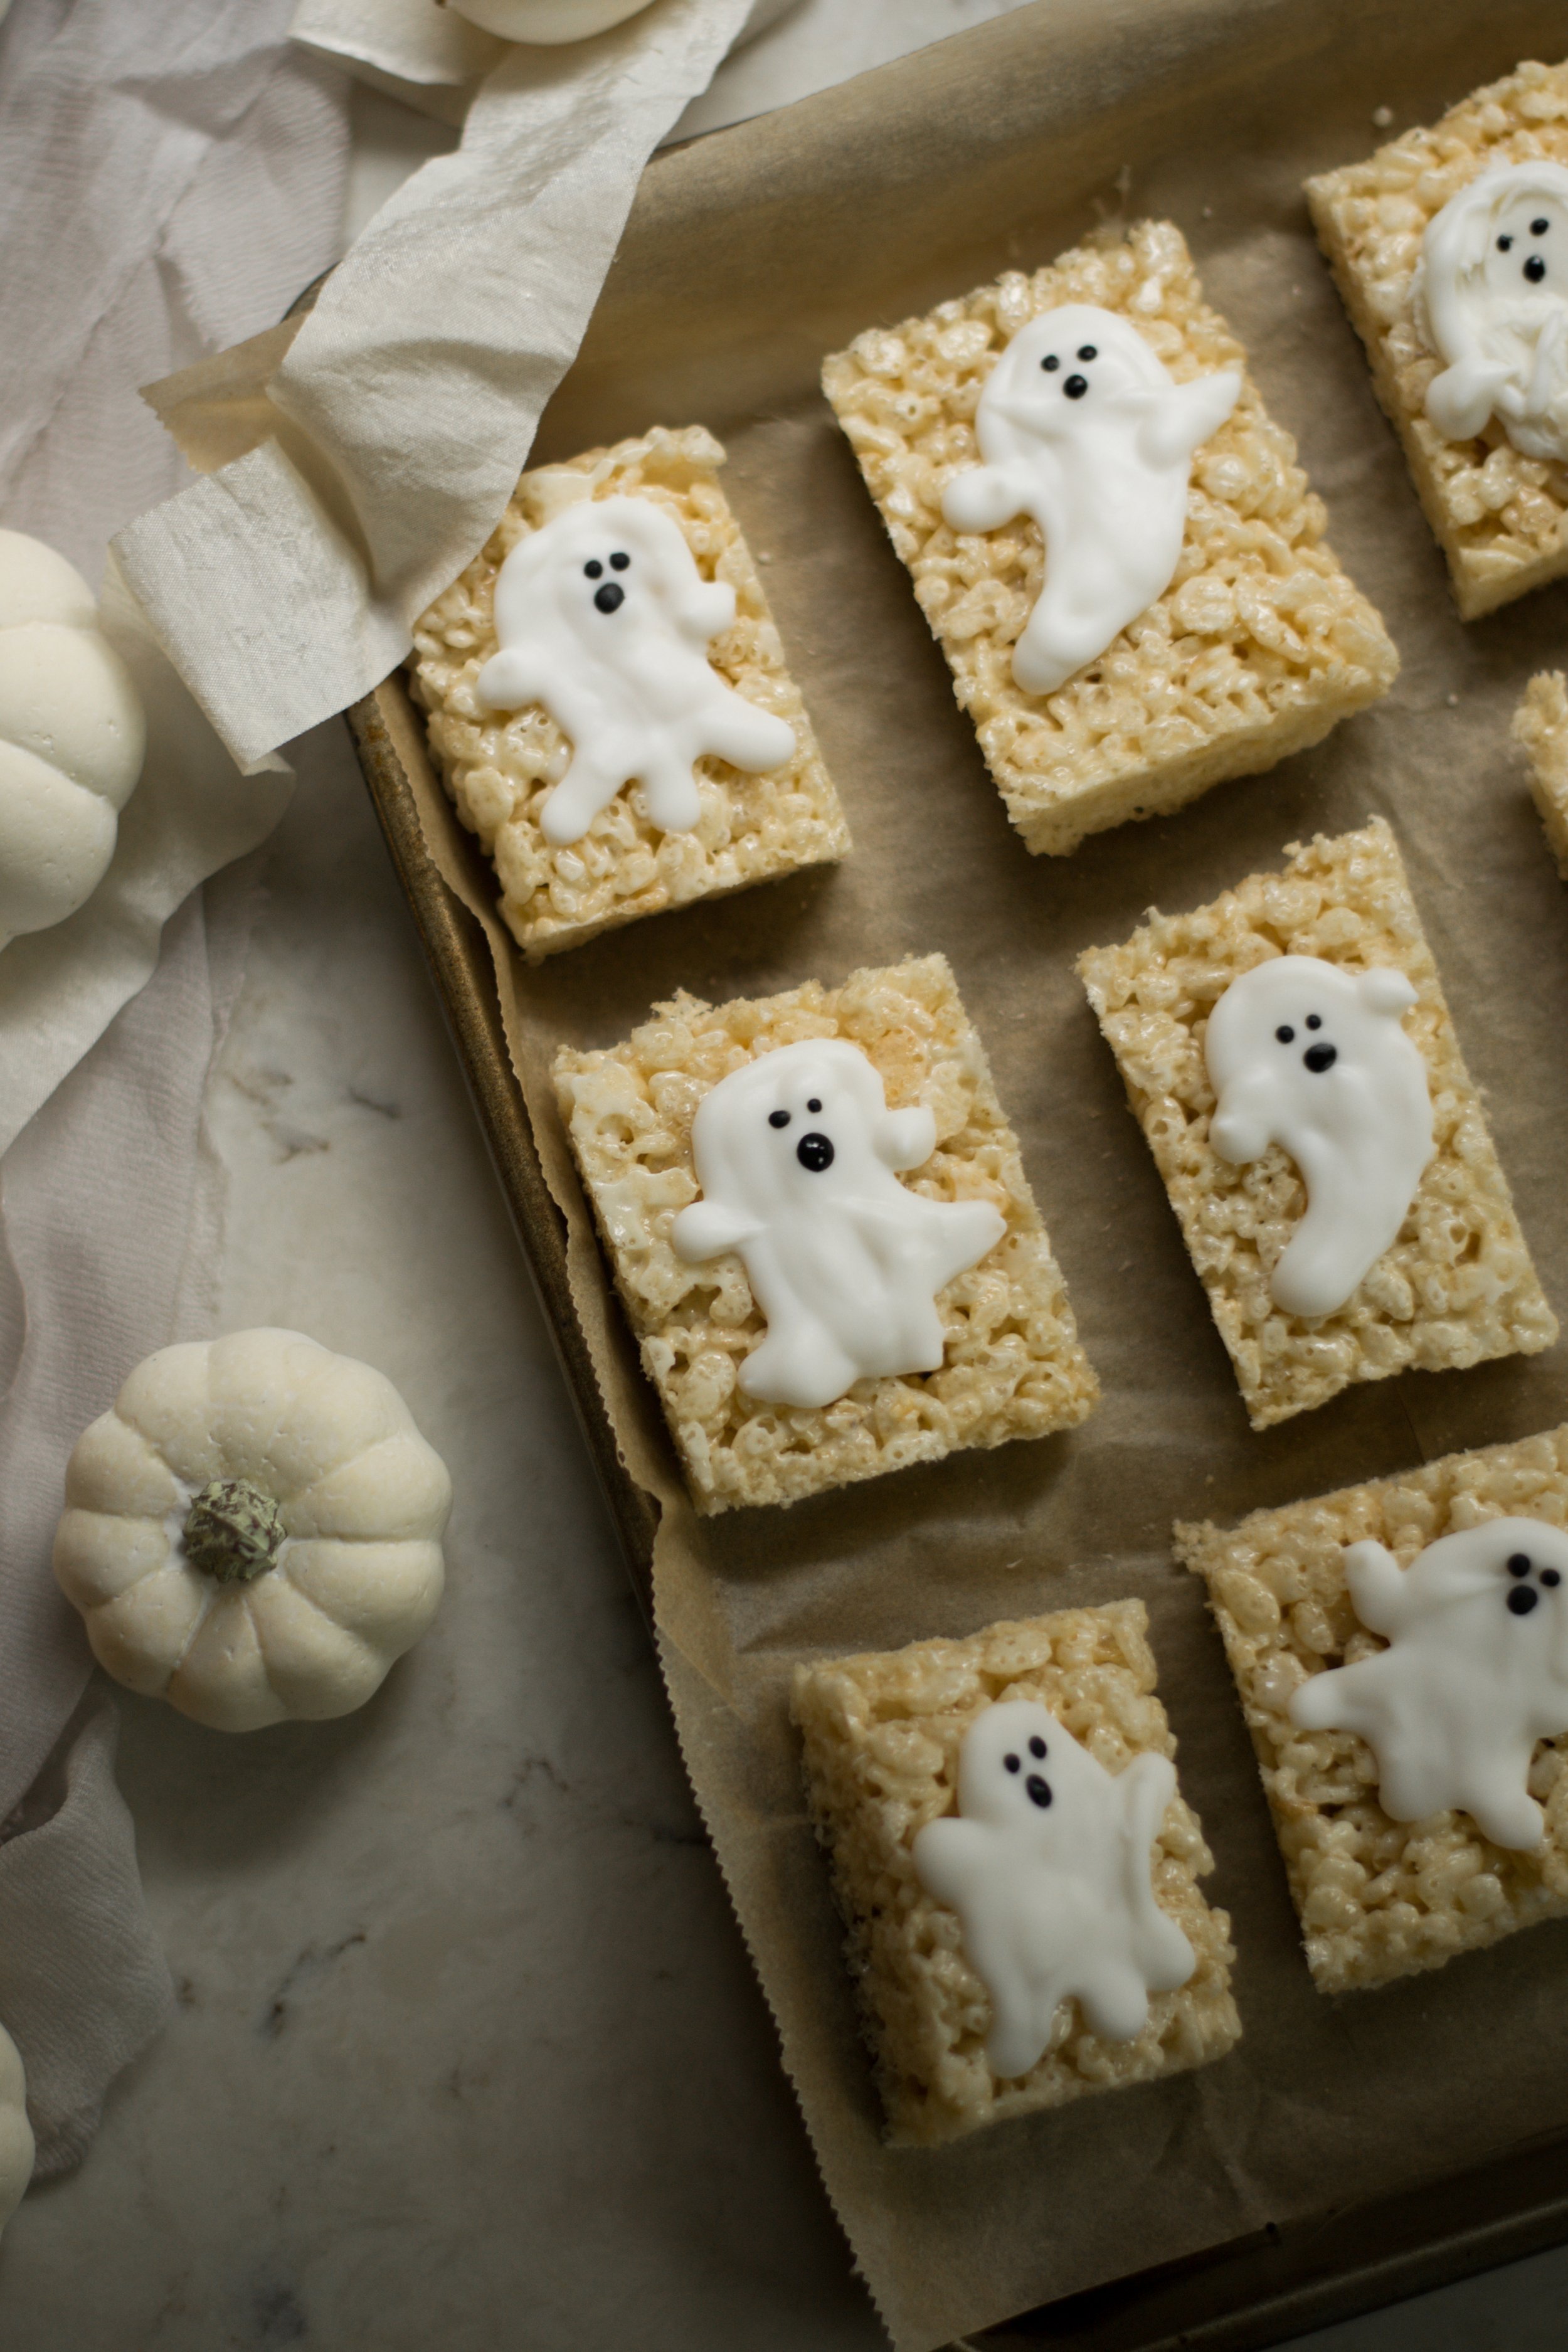
Allow to cool….and voila! You have the cutest, toddler-friendly treats! I made this over a 2 day period during G’s naptime. If you space it out, ahead of time, the prep is easy! You can also use the fridge to your advantage if you are low on time.
I hope that this is an easy, keep-in-your-back-pocket recipe that you can use year after year for Halloween! If you thought this was useful, I’d love for you to follow along on Instagram where I am always posting about recipes, mocktails, and coffee concoctions from the kitchen.